How to Configure macOS Firewall to Block Unauthorized Connections
The macOS firewall comes disabled by default, but should be enabled whenever possible.
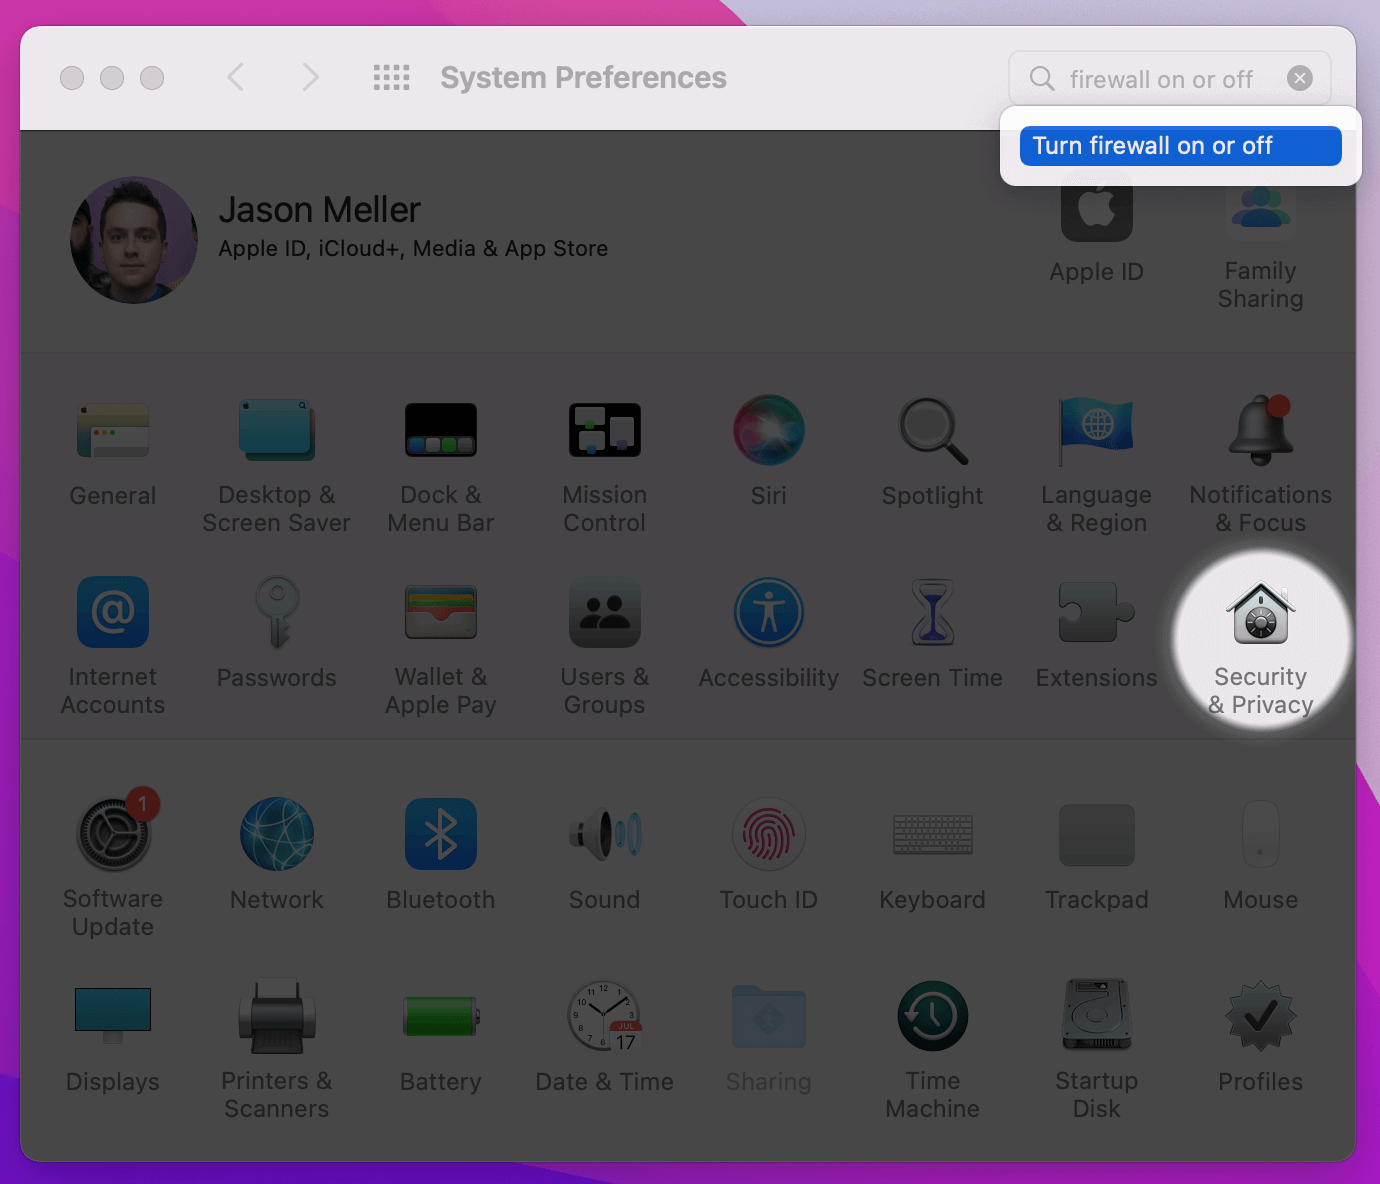
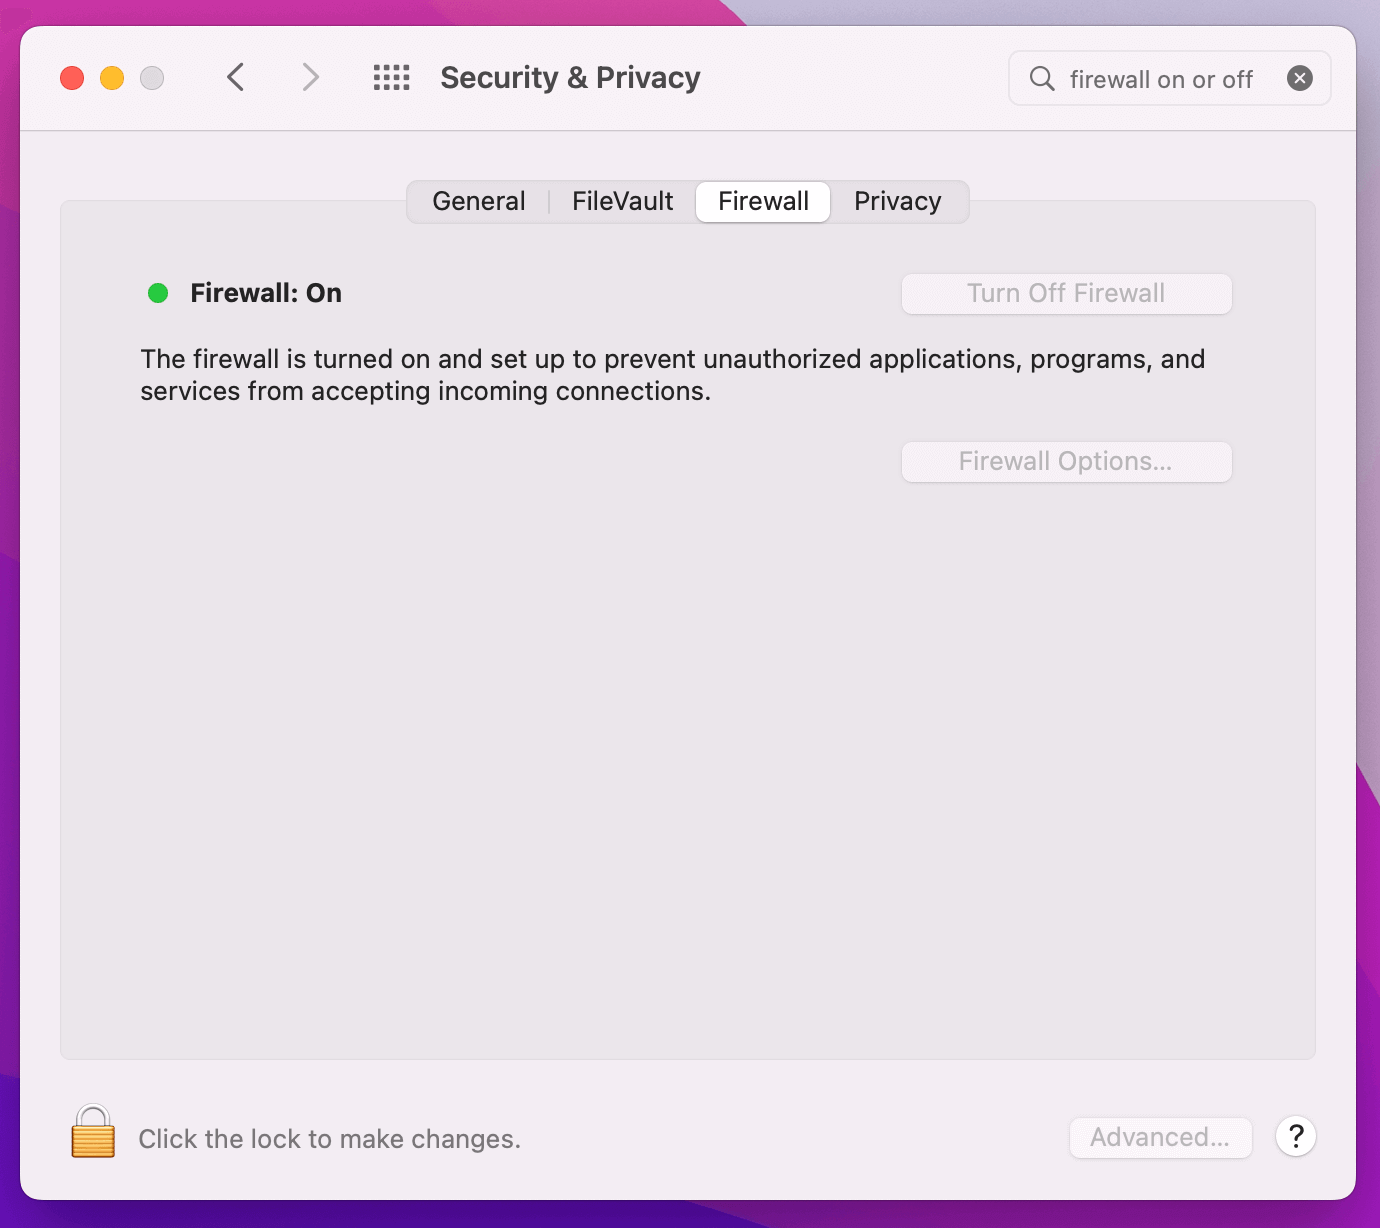
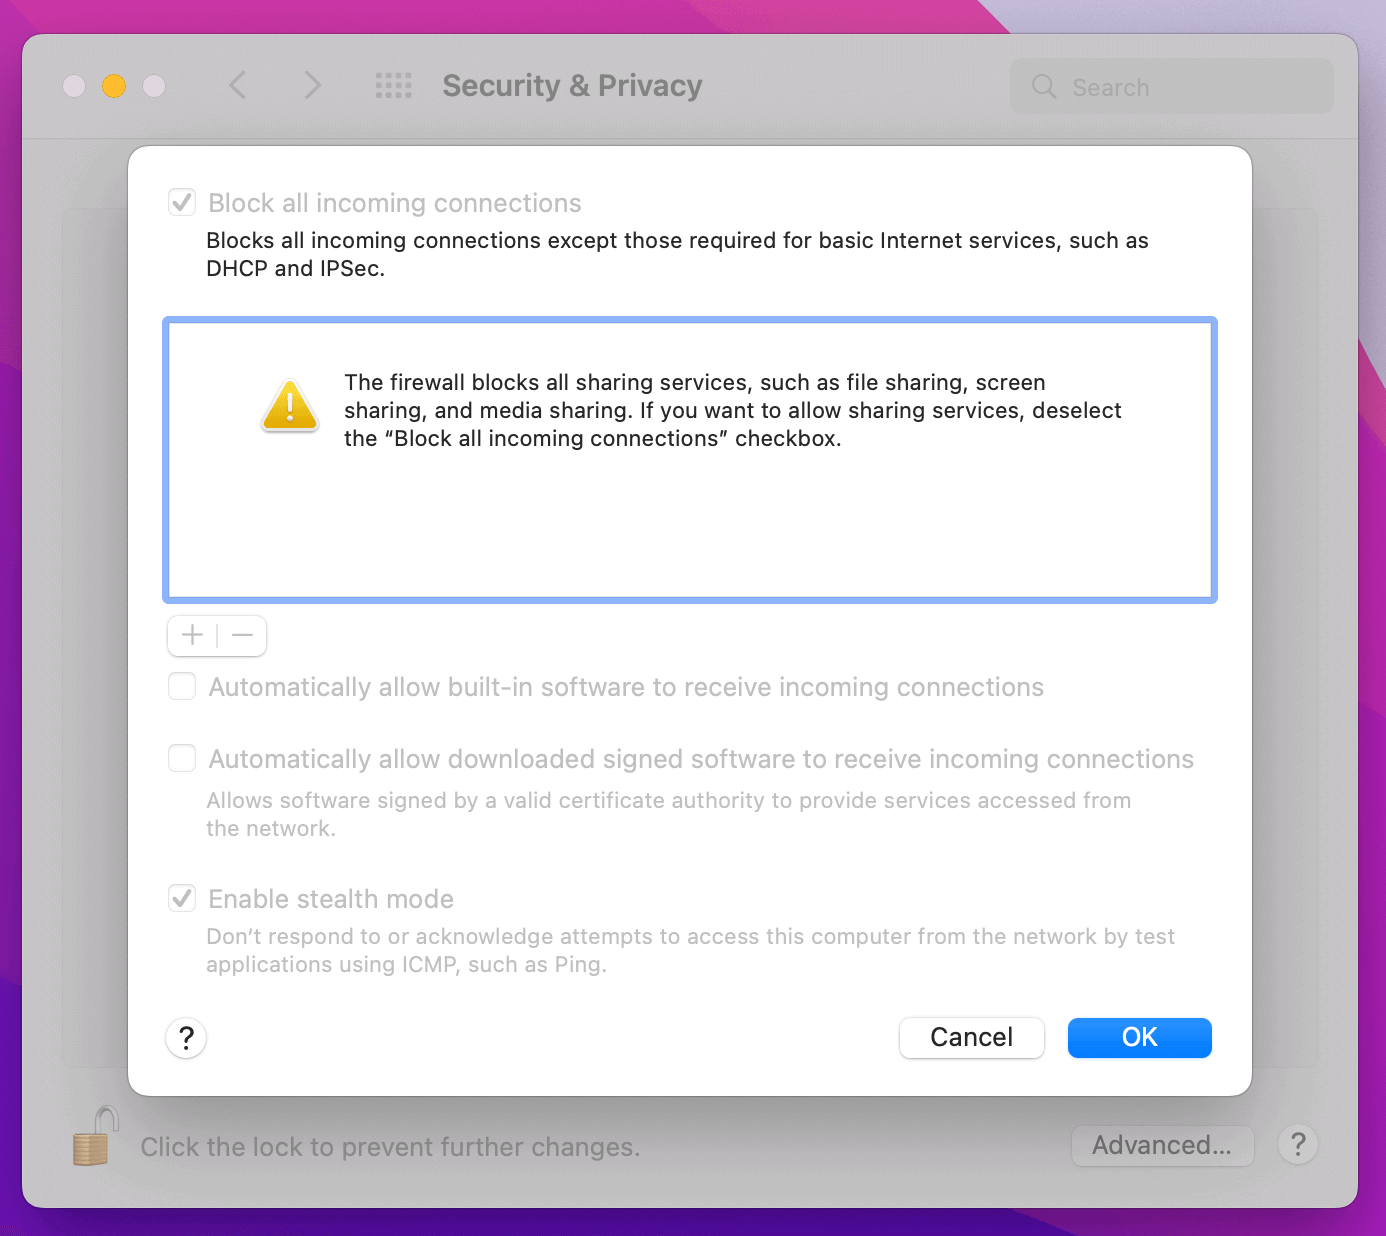
What Is the macOS Application Firewall?
Since 2007, all Macs have come with a built-in application layer firewall that is capable of blocking incoming connections unless they have been explicitly permitted by the end-user.
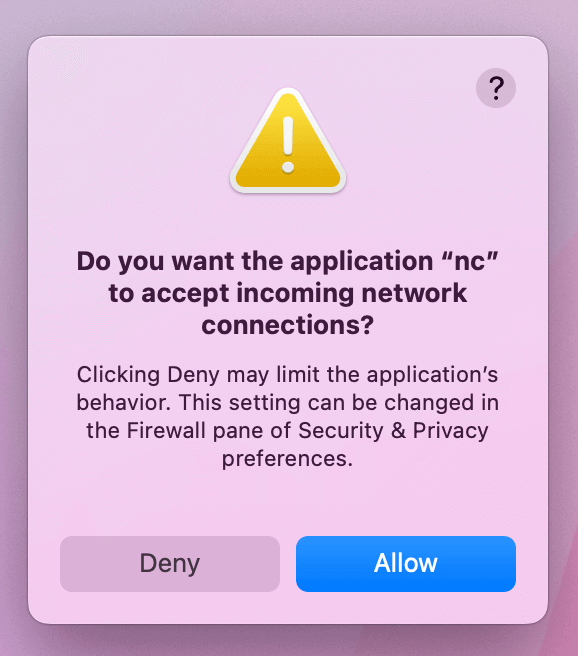
Once enabled, if a previously unknown process attempts to accept incoming
connections you will be prompted with an alert that looks like the following:
Why Should the macOS Firewall Be Enabled?
The macOS firewall comes disabled by default. This is because by default, Apple does not ship any high-risk services that listen for connections on the public internet.
That said, over time, most users (especially technical users like developers) do install software or use macOS features that can listen and respond to connections on public networks. We believe it is important to enable the firewall to block outsiders from making incoming connections to your device, which can undermine its security.
How to Programmatically Determine the macOS Firewall State
There are two methods you can use to programmatically determine the macOS Firewall state. The first approach utilizes built-in macOS CLI tools and the terminal, whereas the second approach uses the osquery open-source project.
Using the Terminal
- Open the Terminal
- Type the command
/usr/libexec/ApplicationFirewall/socketfilterfw --getglobalstate --getblockall --getallowsigned --getstealthmode - The output is self-explanatory, and demonstrated below:
$ /usr/libexec/ApplicationFirewall/socketfilterfw --getglobalstate --getblockall --getallowsigned --getstealthmode
Firewall is enabled. (State = 1)
Block all DISABLED!
Automatically allow signed built-in software ENABLED
Automatically allow downloaded signed software ENABLED
Stealth mode disabled
Using Osquery
You can also use an open-source tool like osquery to determine the status of the macOS Firewall.
SELECT * FROM alf;
allow_signed_enabled = 1
     firewall_unload = 0
        global_state = 1
     logging_enabled = 1
      logging_option = 0
     stealth_enabled = 0
             version = 1.6
Additionally, osquery is capable of enumerating the apps, processes, and services that have been allowed to pinhole through the firewall.
SELECT path FROM alf_exceptions WHERE path LIKE '/Applications/%';
+-----------------------------------------------------------------------+
| path                                                                  |
+-----------------------------------------------------------------------+
| /Applications/Sketch.app/                                             |
| /Applications/Sketch.app/Contents/XPCServices/SketchMirrorHelper.xpc/ |
| /Applications/Tuple.app/                                              |
+-----------------------------------------------------------------------+
Kolide’s endpoint agent includes osquery’s functionality and automatically stores all information about Remote Login and other macOS settings as part of its built-in Inventory. Using Kolide, you can easily enumerate all the devices with this feature enabled.
How to Programmatically Enable the macOS Firewall
While we generally don’t recommend forcing the firewall to be on for all users (more on that later), there are two approaches should you decide to remotely manage this setting.
With the Command Line
If you can run scripts across your Macs, you can use the aforementioned
socketfilterfw utility to programmatically set the firewall state.
Here is an example of a script that includes our recommended configuration.
#!/bin/sh

echo " Enable Firewall"
sudo /usr/libexec/ApplicationFirewall/socketfilterfw \
  --setblockall off \
  --setallowsigned on \
  --setallowsignedapp on \
  --setloggingmode on \
  --setstealthmode on \
  --setglobalstate on
With Mobile Device Management (MDM)
If you use an MDM product like Apple Business Essentials,
you can disable the entirety of the Sharing section in SystemPreferences with a
.mobileconfig profile (using the payload below).
<?xml version="1.0" encoding="UTF-8"?>
<!DOCTYPE plist PUBLIC "-//Apple//DTD PLIST 1.0//EN" "http://www.apple.com/DTDs/PropertyList-1.0.dtd">
<plist version="1.0">
<dict>
    <key>PayloadContent</key>
    <array>
        <dict>
            <key>BlockAllIncoming</key>
            <true/>
            <key>EnableFirewall</key>
            <true/>
            <key>EnableLogging</key>
            <true/>
            <key>EnableStealthMode</key>
            <true/>
            <key>LoggingOption</key>
            <string>detail</string>
            <key>PayloadDescription</key>
            <string>Configures Firewall settings</string>
            <key>PayloadDisplayName</key>
            <string>Firewall</string>
            <key>PayloadIdentifier</key>
            <string>com.github.erikberglund.ProfileCreator.7666956F-AA94-4810-802A-32F99239FFB4.com.apple.security.firewall.DFA5361A-1AF9-4E14-B9EA-01A673545BEA</string>
            <key>PayloadOrganization</key>
            <string></string>
            <key>PayloadType</key>
            <string>com.apple.security.firewall</string>
            <key>PayloadUUID</key>
            <string>DFA5361A-1AF9-4E14-B9EA-01A673545BEA</string>
            <key>PayloadVersion</key>
            <integer>1</integer>
        </dict>
    </array>
    <key>PayloadDescription</key>
    <string>Enable Firewall and ensuring logging/stealth mode is also enabled</string>
    <key>PayloadDisplayName</key>
    <string>Enable Firewall</string>
    <key>PayloadIdentifier</key>
    <string>com.github.erikberglund.ProfileCreator.7666956F-AA94-4810-802A-32F99239FFB4</string>
    <key>PayloadOrganization</key>
    <string>Kolide</string>
    <key>PayloadScope</key>
    <string>System</string>
    <key>PayloadType</key>
    <string>Configuration</string>
    <key>PayloadUUID</key>
    <string>7666956F-AA94-4810-802A-32F99239FFB4</string>
    <key>PayloadVersion</key>
    <integer>1</integer>
</dict>
</plist>
End User Impacts of Forcing the Firewall To Be Enabled
While these are both effective ways of enabling the firewall, they can create new and more nuanced problems. For example, developers are often concerned that the firewall may be causing connectivity issues with important services, like those which run inside Virtual Machines or Docker containers.
If you force the firewall to be enabled at all times you may prevent a software engineer from correctly troubleshooting a pressing issue, forcing them to work around the instructions (disabling the MDM) or using their personal devices.
This is why Kolide recommends an approach where end users are reminded (not forced) to turn on the firewall if they’ve left it off too long.
How Does Kolide Remediate This Problem?
Automatically remediating this issue isn't necessarily the best way to go. Instead, consider following the Honest Security approach by blocking devices from authenticating to SaaS apps until they've fixed the problem.
Kolide's Okta Integration does exactly that. Onece integrated in your sign-in flow, Kolide will automatically associate devices with your users' Okta identities. From there, it can block any device that exhibits this problem and then provide the user, step-by-step instructions on how to fix it. Once fixed, Kolide immediately unblocks their device. Watch a demo to find out more.